

Homeowners: Install Solar Tubes in a Weekend, Seal the Shaft
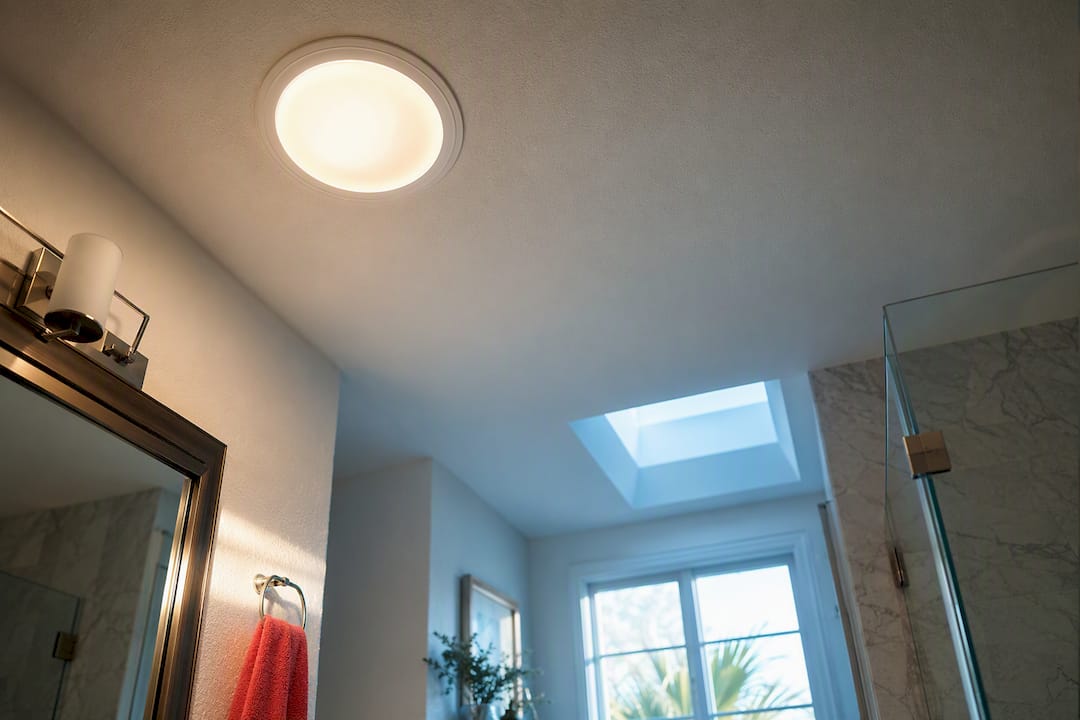
Solar tubes are one of the most affordable ways to bring real daylight into a dark hallway, bathroom, or closet, and many homeowners can install one safely in a weekend. They work best on simple pitched roofs with clear attic access above the target room. If your roof has steep pitches, tile or metal roofing, or a cramped attic full of ductwork, hire a licensed installer instead. Flashing quality decides whether the job stays leak-free for decades.
TL;DR:
Proper placement of the solar tube is crucial to maximize light and minimize leaks, with the diffuser ideally centered over the target area.
Rigid shafts offer better reflectivity over long distances, but flexible shafts are easier to route around attic obstructions, though they lose brightness with bends.
DIY installation costs typically range from $250 to $600, but complex roofs or tight attic spaces usually require professional help, raising total costs to over $650.
Insulating and sealing shafts with proper materials prevents condensation issues, especially in humid climates where moisture meets cold surfaces.
Most leaks and dimming problems stem from improper flashing or sealant, which can be minimized by thorough water testing post-installation.
Table of Contents
What Is a Solar Tube, and When Should You Choose One Over a Skylight?
A solar tube installation has three parts: a clear acrylic or polycarbonate dome on the roof, a reflective shaft that carries sunlight down through the attic, and a ceiling diffuser that spreads the light into the room below. Rigid shafts reflect light more efficiently over long runs, while flexible shafts are easier to route around attic obstructions but lose brightness with every foot of length and every bend.
Sizing depends on the room:
10-inch tubes work well for hallways, closets, and small powder rooms.
14-inch tubes are built for full bathrooms and kitchens where more square footage needs coverage.
Choose a tube over a skylight when you want light, not a view, and when your budget or roof structure rules out a large glass unit.
Solar Tube Benefits and Drawbacks Compared With Skylights
Solar tubes outperform glass skylights on efficiency and cost, but they trade away flexibility. The compact dome sheds heat and cold far more efficiently than a large glazed skylight unit, and the small roof penetration means fewer places for water to find a way in.
What works in their favor:
Lower installed cost than a comparable skylight, with far less framing work.
Reduced heat gain in summer and heat loss in winter compared to glass.
UV-filtering diffusers that protect flooring and furniture from fading.
Consistent, glare-free daylight throughout most of the day.
What to plan around:
No outdoor view and no fresh-air option.
Limited light control (some models offer dimmers, most do not).
Performance drops in cloudy climates or under heavy tree cover.
Household lighting accounts for roughly 10 to 15 percent of typical electricity use, and a well-placed solar tube can offset a real share of that by replacing daytime bulb use with free daylight.
Where Can You Install a Solar Tube on Your Roof?
Placement decides how much light you actually get, and it decides how easy the flashing job will be. Get this wrong and you will fight leaks and dim rooms for years.
Check your roof pitch. Most solar tube kits are rated for roof slopes between roughly 15 and 60 degrees; flat or low-slope roofs need a curb-mounted adapter kit instead of a standard flashing kit.
Avoid valleys, hips, and dormers. These areas concentrate water flow and complicate flashing, raising leak risk even with a quality kit.
Center the diffuser over the work area, not just the room’s midpoint. A bathroom vanity or a hallway junction needs light more than a corner closet does.
Pick your shaft type based on distance. Use rigid sections when the attic run is short and straight; switch to flexible shaft when you need to jog around a truss or duct, but keep flexible runs short and minimize bends to protect brightness.
How to Install a Solar Tube Step by Step
Installing solar tubes is a logical, sequential process. Rush the pre-checks and you risk cutting into wiring or a duct run; rush the sealing and you risk a slow leak that shows up as a water stain a year later.
Before you touch the roof:
Pick your ceiling location and mark it with a nail or drywall probe pushed up into the attic.
Go into the attic and confirm the spot is clear of rafters, wiring, and ductwork.
Drill a small pilot hole through the roof deck at your marked spot and probe around it with a bent wire to feel for hidden obstructions before you commit to a full cut.
On the roof:
Cut the roof opening to the size specified in your kit’s template.
Install the manufacturer’s flashing according to your roof covering (shingle, tile, or metal each use a different flashing profile).
Set the dome assembly into the flashing and secure it per the installation instructions. Manufacturer resources like Solatube’s installation videos walk through this sequence in detail and are worth watching before you start.
Seal all flashing edges with roofing sealant rated for your climate.
In the attic and ceiling:
Assemble rigid tube sections (or route the flexible shaft) between the roof dome and the ceiling opening.
Connect the shaft to the ceiling ring and confirm every joint is snapped and taped per the kit instructions.
Secure the interior diffuser to the ceiling ring.
Finishing touches:
Wrap the shaft with insulation where it passes through the attic.
Seal the interior diffuser trim ring against the ceiling drywall.
Run a water test with a garden hose and check the attic for drips, then check again after the next real storm.
Pro Tip: Do the pilot-hole and wire-probe test even if you’re confident about your attic layout. It takes five minutes and it’s the cheapest insurance against cutting into a wire or duct you forgot was there.
DIY Kit or Licensed Installer: What Should You Budget?
A DIY solar tube kit typically costs $250 to $600, and a capable homeowner can usually complete one install in a weekend. Professional installation runs higher once you add labor, flashing upgrades, and any roof repair the crew finds along the way, and total installed costs commonly land between $650 and $2,150 depending on the model and how complicated the roof is.
Choose DIY when:
Your roof has a simple asphalt shingle surface and a moderate pitch.
Your attic is open and easy to move around in.
You’re comfortable using a jigsaw or reciprocating saw on roof decking.
Hire a pro when:
You have a tile, slate, or metal roof (each needs specialized flashing).
The pitch is steep enough that safe footing is a concern.
Your attic is packed with HVAC ducts, wiring, or low clearance that makes routing the shaft difficult.
Pairing the installation with a re-roofing project can also trim labor cost, since the roof is already open.
Insulating and Air-Sealing the Shaft the Right Way
Condensation is the most common complaint homeowners report after a solar tube installation, and it almost always traces back to a poorly insulated or poorly sealed shaft. Warm, moist household air meets a cold metal tube in the attic, and water droplets form on the inside of the dome.
Wrap the shaft in insulation as it passes through the attic; R-15 batt insulation or an equivalent wrap is a solid baseline in humid climates.
Seal every joint between shaft sections with the manufacturer’s tape or sealant, not generic duct tape.
Seal the diffuser trim ring tightly against the ceiling drywall to stop household air from migrating into the shaft cavity.
Pro Tip: In coastal and humid regions, add an extra wrap of insulation around the shaft’s top few feet, right where it meets the roof dome. That’s where the temperature swing is sharpest and where condensation forms first.
Why Is My Solar Tube Leaking or Losing Brightness?
Most solar tube problems fall into three categories: leaks, dimming, and condensation. Catching them early keeps a small fix from becoming a ceiling repair.
Run a hose test right after installation and check the attic for any moisture, then repeat a visual check after the season’s first hard rain or windstorm. A leak that shows up months later almost always points to flashing that shifted or sealant that dried out.
Dim output: usually a dirty or scratched dome, a crushed section of flexible shaft, or a loose joint letting light escape into the attic.
Persistent condensation: points back to insufficient shaft insulation or a gap in the ceiling seal, as covered above.
Whistling or drafts: almost always a diffuser trim ring that isn’t fully sealed against the ceiling.
Clean the exterior dome once or twice a year, and expect most quality tubes to last 15 to 20 years with minimal maintenance beyond that occasional wipe-down.
Why Trust a Local Solar Installer for This Job?
Florida Solar East, LLC specializes in solar energy solutions across residential and commercial properties, and daylighting upgrades like solar tubes fit naturally alongside the photovoltaic, pool heating, and hot water systems the company installs every day. That range matters because a technician who understands attic layouts, roof penetrations, and Florida’s humidity patterns brings the same judgment to a small tube install that they bring to a full rooftop solar array.
Florida Solar East, LLC offers free estimates and installation support, so homeowners unsure whether their roof is a good candidate can get a straight answer before committing to a project. You can request a site visit through the company’s service request page to have a technician walk your attic and roof before any cutting starts.
Do You Need a Permit for a Solar Tube Installation?
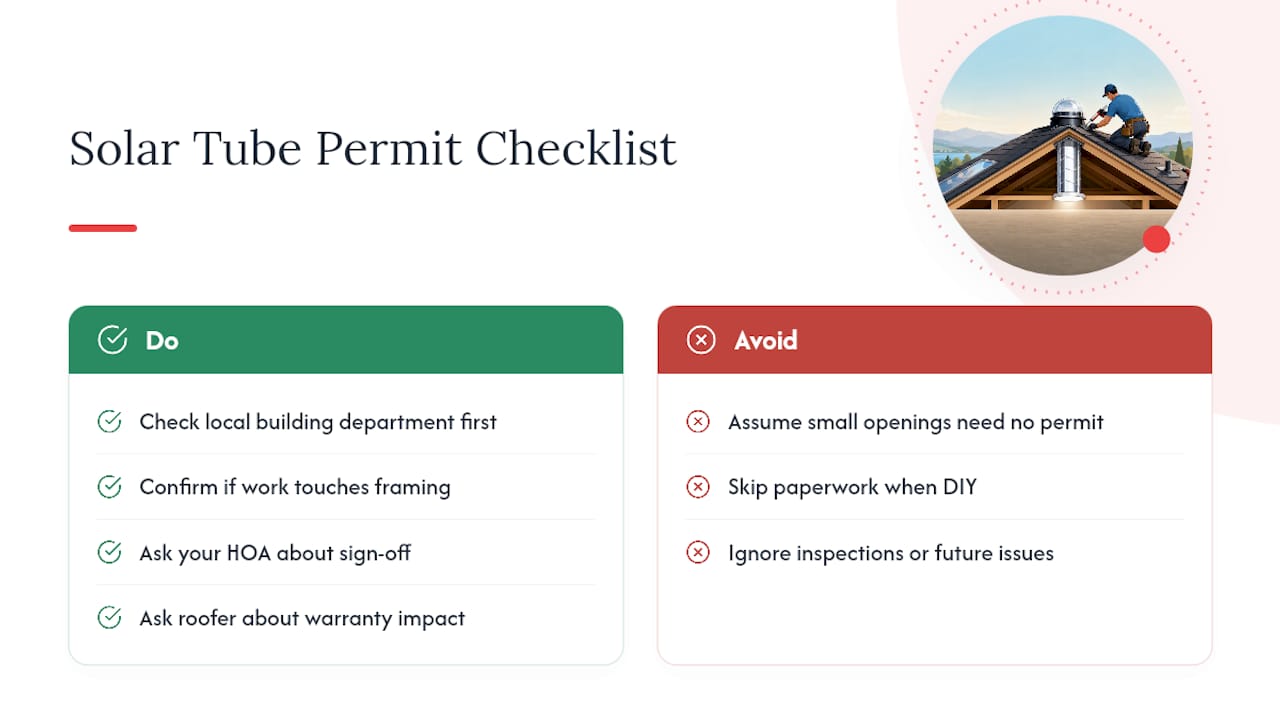
Most municipalities treat a solar tube installation as a minor roofing modification, which means permit requirements vary widely by jurisdiction and sometimes by roof type. Some building departments waive permits entirely for tubes under a certain diameter, while others require a roofing permit any time the roof deck gets cut, regardless of the opening’s size.
Check with your local building department before you start, not after. A quick phone call or a look at your county or city permitting website will tell you whether a solar tube installation needs a permit, an inspection, or neither. In many areas, the deciding factor is whether the work touches structural roof framing. A tube that fits between existing rafters without cutting them typically faces lighter scrutiny than one that requires rafter modification.
Homeowners associations add another layer worth checking. Some HOAs have rules about visible roof fixtures, dome colors, or placement that have nothing to do with your local building code but still require sign-off before installation. If your home is under a warranty from a recent re-roofing job, ask your roofing contractor whether cutting into the deck for a solar tube affects that warranty. Some roofing warranties include clauses that void coverage if an unrelated party opens the roof deck without notifying the original installer.
If you’re working with a licensed installer, permit pulling is usually part of the service. If you’re doing it yourself, budget an extra day or two into your project timeline for the paperwork, and never skip this step just because the physical installation looks simple. An uninspected roof penetration can complicate a future home sale or insurance claim.
Not All Solar Tubes Are Built the Same
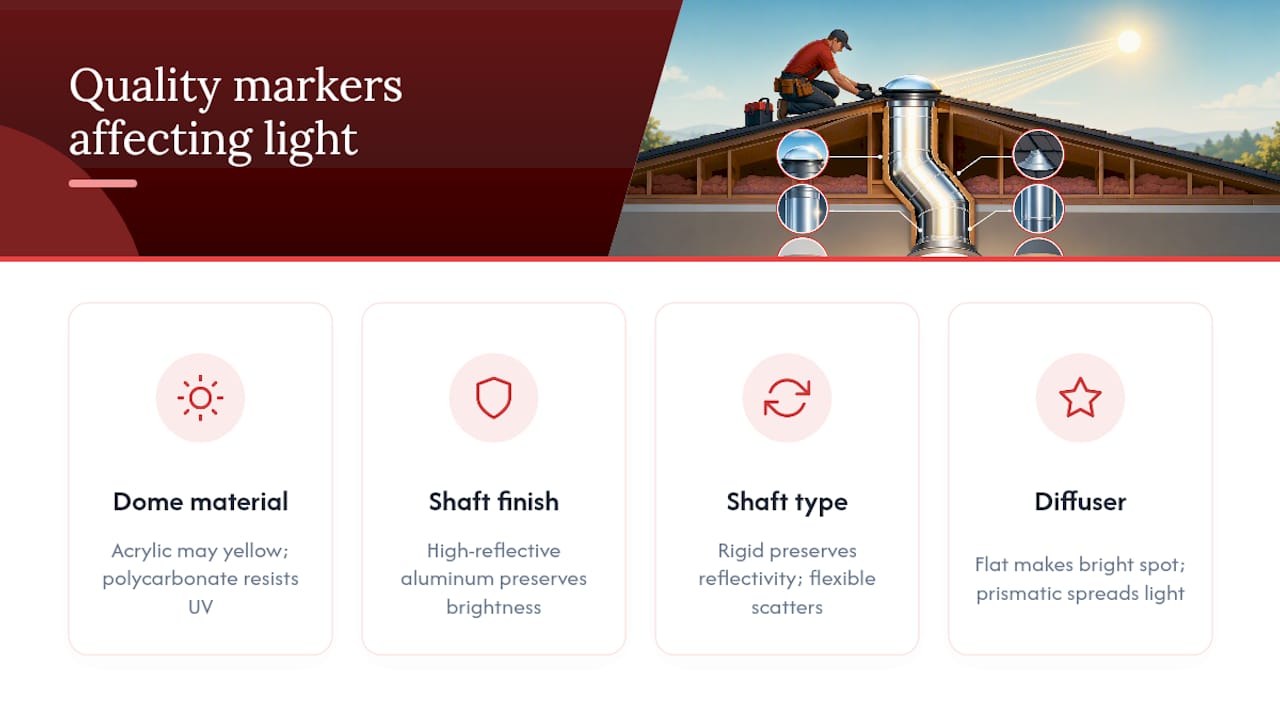
Solar tube quality varies more than most first-time buyers expect, and the differences show up directly in how much light reaches your room. The dome material is the first fork in the road: acrylic domes cost less but can yellow or haze over time under intense UV exposure, while polycarbonate domes resist impact and UV degradation better and tend to hold their clarity longer.
The reflective shaft material matters just as much as the dome. Higher-grade tubes use a highly reflective aluminum coating that can carry close to full brightness down a rigid shaft, while budget models use thinner, less reflective material that loses noticeably more light per foot, especially on longer runs. This is where rigid and flexible shafts diverge most sharply. A rigid shaft preserves reflectivity better over distance, while a flexible shaft’s corrugated walls scatter light at every bend.
Diffuser design is the third quality marker. A basic flat diffuser lets light through but does little to spread it evenly, leaving a bright spot directly under the tube and dimmer corners. Premium diffusers use prismatic or frosted lenses engineered to scatter light across the entire ceiling area, which makes a real difference in how usable the light feels for reading or task work.
Some higher-end models also add features like a manual or motorized dimmer, an integrated LED light kit for nighttime use, or double-glazed domes for better insulation in extreme climates. These add cost but close the gap between a bargain kit and a fixture that performs closer to a well-placed window.
How Much Energy and Environmental Benefit Do Solar Tubes Actually Deliver?
Solar tubes save energy by directly displacing the electric lighting you would otherwise run during daylight hours. Lighting typically makes up roughly 10 to 15 percent of a household’s total electricity use, and a tube installed in a frequently used space like a kitchen or bathroom can meaningfully cut into that share simply by making it unnecessary to flip a switch during the day.
The environmental benefit follows directly from that reduced consumption. Less electricity drawn from the grid during daylight hours means a smaller carbon footprint tied to that portion of your home’s energy use, particularly in regions where electricity still comes largely from fossil fuel generation.
There’s a well-being dimension too that often gets overlooked in the energy conversation. Natural, diffused light exposure is linked to improved mood, productivity, and even sleep quality, which means a solar tube installation delivers value that never shows up on a utility bill. A dark interior hallway or windowless bathroom that suddenly gets consistent daylight changes how a room feels to use, not just how much it costs to light.
None of this rivals the output of a full rooftop solar array, and a solar tube shouldn’t be mistaken for a serious dent in your overall home energy bill. But as a low-cost, low-risk upgrade with a fast payback period, it earns its place on almost any energy-efficiency project list.
Can a Solar Tube Work With Your Existing Lighting Setup?
A solar tube installation doesn’t replace your electrical lighting. It supplements it, and the two systems need to coexist in the same ceiling space without stepping on each other. In most homes, that means simply confirming your chosen location doesn’t conflict with an existing ceiling fixture, fan, or smoke detector before you cut anything.
Some solar tube models solve the overlap problem directly by building an electric light kit into the diffuser assembly. These hybrid units use the same fixture housing for both daylight and a nighttime bulb or LED module, which is a practical choice for a bathroom or hallway where you want one continuous look day and night rather than two separate fixtures competing for the same ceiling real estate.
If you’re installing a standalone tube near an existing light fixture rather than replacing it, plan the layout so the two sources complement each other instead of overlapping awkwardly. A tube placed a few feet from an existing overhead light, rather than directly beside it, usually gives better coverage across the whole room.
Wiring work only enters the picture with integrated light-kit models, and that wiring should run through a licensed electrician if you’re not comfortable with basic fixture wiring yourself. Standard daylight-only tubes need no electrical connection at all, which is part of why they’re such an approachable DIY project for homeowners who want more light without touching their home’s electrical system.
An Editor’s Take on Solar Tube Installation
Most guides treat solar tube installation as a pure DIY slam dunk. It isn’t always. The real skill isn’t cutting the hole. It’s verifying what’s above your ceiling and what’s around your flashing before you ever pick up a saw. If your attic is clear and your roof is a standard asphalt shingle, do it yourself. If either of those isn’t true, hire a pro and save yourself a callback six months later.
— Ronnie
Ready to Brighten Your Home? Here’s How Florida Solar East Helps
Solar tube installation is a project many homeowners can tackle themselves, but if your roof has tile, metal, or a steep pitch, a professional eye saves you the guesswork and the risk of a leak you won’t spot until it’s already caused damage. Experienced roof and attic expertise from solar panel and pool heating jobs supports daylighting projects, backed by free site estimates before any work begins.

Our technicians check your attic layout, roof pitch, and flashing needs, then give you a clear price before you commit to anything. If you’d rather pair a solar tube with a broader energy upgrade, our team can also walk you through residential solar electric options during the same visit. Request your free estimate through our service request page and get a straight answer on what your roof needs.
Sources
Recommended

Comments